Friday, November 25, 2011

Time to Clean Up!


Do you find that you have WAY TOO MUCH when it comes to scrap supplies? I know that i have enough supplies to last me a lifetime and then some, but i still *need* the latest and greatest! Have you ever thought of getting rid of some of your gear? There's lots of ways to do this, but here's just a few i've thought of:

Ebay
 Selling stuff on ebay couldn't be easier - take a photo, write a description and sit back and wait. On ebay these days you can list up to 30 items at 99c starting price for free - so if they don't sell, you haven't lost out! You just pay a very small percentage of your sale amount once the sale is finalised!!! It's a good idea to package stuff into bundles. You could do so in:
  • Colours
  • Manufacturers
  • Themes
  • Product type etc.
Another idea is to do random pizza boxes full of items

Facebook
There are heaps of pages on Facebook at the moment, dedicated to selling and/or swapping goods. The beauty of this is that you can ask a price and negotiate without committing to anything final. This could be a negative though, too. You can list things in a similar way to ebay, and even sell your own hand-made goods! You can even set up your own sale page on Facebook if you have heaps to sell and don't want to go through a page like Aussie Scrappers Garage Sale


To get started cleaning up, just start taking out things that you know you don't want to use any more. Then after that, things will get a little harder as you will have lots of things that you really love but you're not sure if you will use it. Just sort through it as well as you can and you'll get there. You don't have to list it all at once, but you might sell more if you do - since buyers will like to combine postage, and will be more likely to buy more than one item that way. 


The best thing about selling your stuff that you're not using, is that you will make money back on it. It won't be what you paid for it, but it's better to get rid of it so that your gear isn't so cluttered and have a little bit of spending money. You'll be able to refresh your stash with a few key things - or even buy an album or something that you've been really wanting for a while!
Storage

Storage is a big issue for us scrapbookers - we have so much stuff that it can get  bit beyond us. There's plenty of expensive storage solutions out there - and they are sooooo nice, aren't they!!! Craftainers is one of my favourite drool sites, and i must admit that i have spent a pretty penny there over the years making my scrap room look awesome and become more functional (especially before children!!!). But, now i'm limited to just a cupboard and a very tiny budget, so what do i do now?

Well, there's lots of things you can do to save money in the storage department - but one of the best tips i can give you is to have everything at hand!!! If you can access everything really easily, you're less likely to get into the 'i can't be bothered digging it out' mind-set, and you won't use most of the awesome stuff you've got!!!

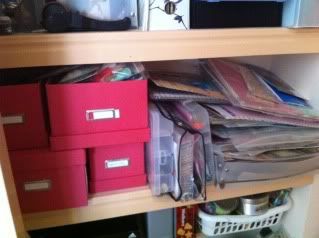
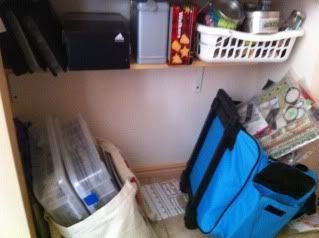
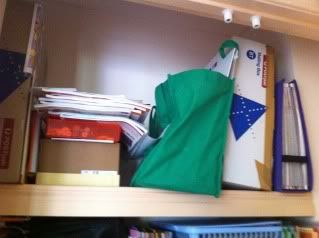
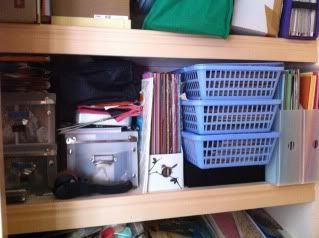
Truth time - here's what my scrap cupboard actually looks like right now, shelf by shelf:

Photobucket

Photobucket

Photobucket

Photobucket

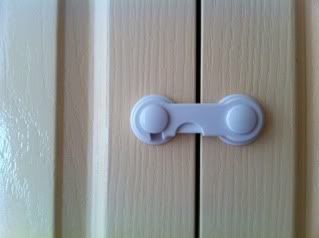
And my newest secret weapon against my toddler:

Photobucket

So, as you can see it's nothing flash! I have some cheap A4 mesh boxes that i keep all of my alphas in. I got these 3 for $10 i think!! My blue tote was $19 from K-mart and i keep all of my kits in there, plus my journal pens, edge punches and dymo - this, plus my tool tote (not pictured, because it was on my table) is what i grab when I'm going to a crop and i'm in a hurry. If I'm not in a hurry, a grab a woolies bag and chuck a few extras in.

I like to have my photos sorted in date order, divided into months, so i bought some cheap clear photo boxes (not currently up to date - must do that!!!) I've got ribbons and flowers and bling in shoe-boxes and mesh baskets. Those pretty pink boxes are from Kikki-K - a major splurge which i LOVE - these have been purchased over the years, and were mostly birthday presses!!! I have one for old photos, one has all my mists in it, one has all my journal spots in it and the big one that's easies to get to is my 'go to' embellishment box - i HIGHLY recommend finding a nice box to put all the embellies you use lots of - since they are easy to get to and all in one spot, you'll find you use them heaps!!

See that really messy spot in the middle of my cupboard? This is my 'to file' pile - stuff that just doesn't have a home yet! Every now and again i get motivated to sort this out, but not very often LOL.

So, some major tips for storage:

  • Sort everything out and identify what containers/boxes you need - e.g. i found that i needed somewhere for my alphas because i'm really obsessed with them LOL, i then found a $10 solution for them!!
  • Get a nice, reasonably sized box for your favourite embellies and keep them all together
  • Divide things by colours, e.g. I have all of my ribbons divided into zip-lock bags by colours, and then they are just all in a shoe box - that way, when i need one i grab the box then find the right bag and just sort through this!
  • Always have a tote/bag ready to go to a crop - that way when you are time poor your bank balance doesn't suffer when you get there!
  • Woolies bags are your FRIENDS!!! They are the perfect width for 12x12 scrapbooking stuff and just perfect for taking to crops
  • Store like things together and make sure everything is accessible
  • Try and do a bit of a purge every 6-12 months - donate/sell/swap stuff you're not going to use - you'll find it really refreshing, and you may even make some money in the process!!

Thursday, November 17, 2011

Getting the most out of kits

I'm starting to find kits a really great way to scrap - but only if you work hard to really get the most out of them! Here's a few ways to do that:
  • Keep the kit in a resealable bag or box and don't throw out ANY scraps. Put all your scraps straight back into your bag when you finish a layout so they are there for next time.
  • Have a flick through your photos when you get the kit and put matching photos with your kit. That way you will have photos and papers all matching when you go to scrap!!
  • Add a couple of extra alphas to the kit, including some journalling alphas so you have a bit of choice when it comes to your title - different colours and sizes are helpful.
  • Add any other embellishments that come to mind when you get the kit.
  • When you are getting down to the 'bare bones' of the kit, start doing pages based on card stock and using the scraps as strips etc. Glimmer mist is your friend for making interesting backgrounds!!!
All of these ideas are about basically about making your kit go further - about using what you already have, mixed in with new product so you don't get bored of what you've already got, but you're not spending a fortune on new, unnecessary product.

Of course, you can make up your own kits from what you've already got in your cupboard! Here's some ideas of what to add into a home-made kit:

  • Matching PP's - don't have to be from the same range, but matching colours and/or themes go great together in a home-made kit
  • A few different types of alphas to match the PP's - different sizes are a great idea!
  • Cardstock - White, black and kraft are a great start - and anything else you think you have to match
  • Embellishments - ribbon, bling, buttons, flowers etc - all to match the theme/colours
  • Chipboard - shapes and words/phrases to match the theme of your kit
Home-made kits are a great way to save money when you are going to a shop to scrap. You've got everything you need already put together in your bag - some stuff that you've probably even forgotten you have!! This will stop the temptation of buying just a little bit more for each layout you are doing!! I find i'm really terrible at buying a new set of alphas when i'm out - but when i have made a kit up i never need to do this!!

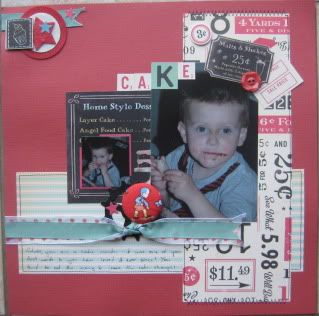
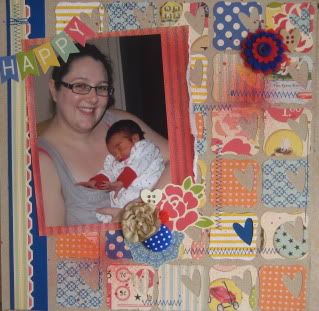
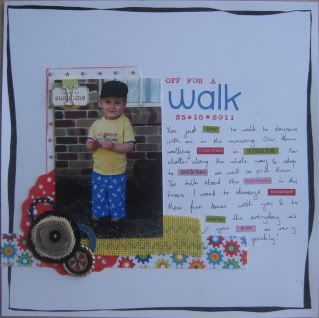
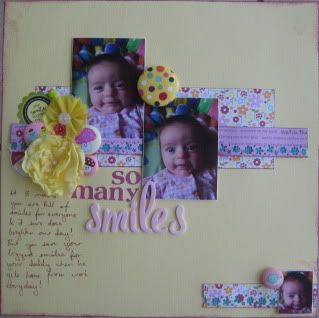
Here's an example of just how far you can make one kit go. I have used the '5 & Dime' OA kit from Scrapbooking From Scratch, and i got all of these layouts from it, plus 2 more which i haven't photographed yet :D

Photobucket

Photobucket

Photobucket

Photobucket

Photobucket

Not bad for a ~$30 kit, huh? And i LITERALLY used it ALL!!!! There were only a few very small scraps and stickers left when i was done - which my son then used in his scrapbook :D

I've also purchased a $20 kit from Wicked Princesses recently, and i've already done 3 LO's, and have HEAPS left - i'd like to get at least another 3 out of it :D Here's the 3 i have done so far:

Photobucket

Photobucket

Photobucket

Pretty cute huh? Notice the first LO was a boy layout? But the kit is a girl kit!! I've used the white base card stock plus some fairly neutral PP from the kit - plus some word stickers from the kit. Word stickers are an AWESOME way to add interest to your journalling!!

I hope i have inspired you to get those kits out and put them to work!!! Or maybe, to make some kits of your own from what you've already got!!! Don't forget to share this post if you think you have friends who may be interested in saving money on their scrapbooking - which i'm sure we all can!!

Saturday, November 5, 2011

Ribbons & Buttons

Here's a quick tip my mum gave me - you know when you buy clothing and they have ribbons attached to the shoulders etc. for hanging purposes? You always cut them off and throw them out right? Why don't you keep them and use them in your scrapbooking? Sure, they are boring but they are always nice and thin - and that can be hard to come by!!! You could even use it for stitching instead of thread!!! And they are usually unusual colours too, so that's an extra bonus!

While i'm on the topic of clothing - you can also use the extra buttons that they give you with clothing in your scrapping! Again, they are boring and plain, but they are usually great quality and can add that certain extra touch that you need sometimes!

Kids clothing can be a great source of unusual buttons and embroidered elements so never throw a worn item out - reuse it in your scrapping!! I did this recently on a page about my son:

Photobucket

Calvin had worn through the toes on this inter onesie, and i was going to throw it out, but then i noticed that cute helicopter and decided that i just HAD to use it in my scrapping!!!! I then also used the zipper too, which is a pretty cool element if you ask me!!!

Saturday, August 27, 2011

Many MANY apologies!!!

I owe my followers a HUGE apology - i'm so so sorry that i never got back onto this blog in 2011!! Christmas Eve we found out that we were expecting our second bundle of joy and she is finally with us now!! The other thing that happened early 2011 was that i got a job, so not only was i sick, but i was busier than ever!!!

Anyway, now i'm back to feeling myself and i'm committed to this blog again. I'd like to offer my apologies by sending a RAK to all of my followers!! Please email your mailing address to me at kylie.smith@me.com and i'll pop it in the post for you!!

In the mean time, i'll resume my money saving scrapping tips by telling you about a 'new' product on the market called "Glubbers". They have been brought out by Cosmo Cricket and they are basically a really really sticky circle which allows you to make awesome flowers like this one below:

Photobucket

Pretty neat, huh? The cost of a pack of Glubbers is around the same price as a pack of Prima flowers. What a great way to save money - use ribbon/scrap fabric which will match your LO perfectly instead of buying a pack of flowers, of which you'll probably only use 1 or 2!!

For ideas on how to use Glubbers, search You Tube!! There are some great videos on how to use them on there!! You can get them from all good scrap stores. I purchased mine from Scrap Boutique.

Don't forget to send me your postal address - you might even find a Glubber in there for you to try out ;P